
Tuesday, October 5, 2010
Since I have been slow to discover new things that I absolutely have to share with the rest of the world (who propably already knows...) I figured I will start writing a few things about basic concepts in Revit. My aim here is to further understanding of the program so that you don't just know the "to do this follow these steps" but the "why" behind it.
Today we'll start with something relatively simple: Views and Schedules. What are they, what are they for and how do you use them.
The first thing we need to let go as we transition from a 2D/3D CAD program (like AutoCAD) into a program that uses a Building Model (like Revit) is the way we view a drawing. In a 2D program a drawing is just a digitized version of lines on paper, which represent a floor plan or an elevation.
In Revit that is not true.
In Revit you build the (almost) entire building inside the computer, putting the information into a database that runs in the background. This means that instead of two lines representing a wall in the floor plan I put into the database an object that is a wall with a certain length, height, position in the building, structure and other characteristics. And from this information Revit will then calculate a drawing that shows the parts of the building that fall within the visible range, e.g. a floor plan or an elevation.
Once we get our minds around this we start to see the possibilites opening up. We have a database! And databases are great not only for storing information but also retrieving the specific information you need.
One way of retrieving this information is by creating Views. This is basically a way to ask the database to "show me any and all objects that I can see from this point, looking in this direction for this distance." This specified by the type of View (Floor Plan, Elevation, Section, etc), the View Range, the Far Clipping, etc. Any 3D object that is in the line of sight will be displayed. I can then further customize each view with Annotations (we'll get to that later), shadows, and a few other things, to suit my needs.
The great thing of this is also that when I change an object in the model - move a wall - the change is refelcted in all views where this object is visible. I also means that I can have multiple plans of the same section of the building - floor plan of the ground floor - that convey different information - electrical installations, square meters, wall and floor finishes - without having to redraw them every time. This reduces the danger of drawing errors considerably.
Another way of retrieving information form the building database is using schedules. This is a non-graphical way of looking at the same data, and so as architects and draftspeople something we are not really used to. But tell the builder who does the calculations on how expensive the project is going to be that you can give him exact numbers on the square meters of brick wall or the number of doors and he well love you forever (or at least until he sees what the costs of your funky design are...).
So stop seeing schedules as something alien and weird and start seeing them as just another way of presenting your design. In the end there are (unfortunately) a lot more people interested in the numbers than in the esthetics.
This concludes my first article on Basic Concepts in Revit. As you can see this is all theoretical and no hands-on. I will try to write some hand-on instructions on the concepts that I cover in other posts. If you have some concept of Revit that you are struggling with, please feel free to leave a comment.
Thursday, September 30, 2010
Austodesk has release the 2nd update for Revit 2011. Contrarty to intuition, this can be found under the product download section, rather than the update section for Revit Architecture on the Autodesk site.

At the same time Autodesk has released the latest Subscription Advantage Pack for Revit 2011, including a new type of server for central files, a conceptual energy analysis tool and a set of extensions. I am now downloading all that and will report on my progress later.
Tuesday, September 28, 2010
OK, so this has nothing to do with Revit, and I am sorry. But I am an avid supporter of OpenOffice and I think it is important that such a project gets all the support it can get.
You might note that I have added a new widget to the sidebar, where you can sign a petition supporting the formation of an independant foundation (called the Document Foundation) which will continue to develop OpenOffice (or rather LibreOffice at the moment) without Oracle looking over their shoulder.
Feel free to sign the petition as well.
OK, and now back to Revit...
Tuesday, September 21, 2010
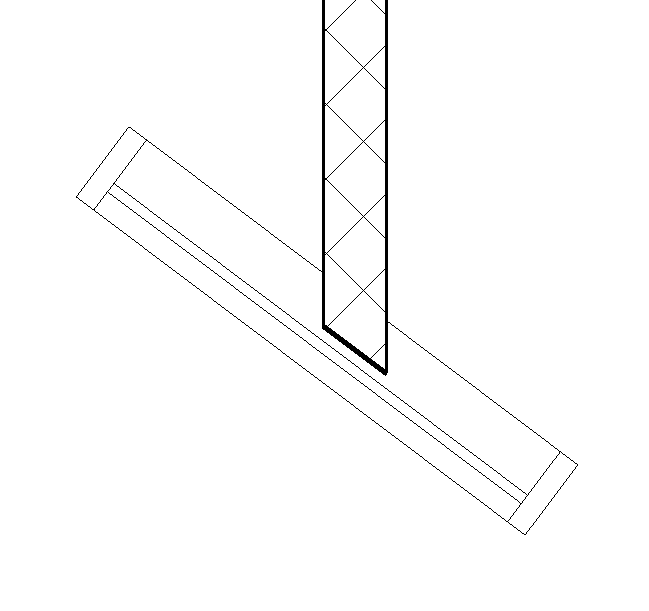
We are in the process of designing a ronded building with an all-glass extgerior. This leads to the situation that an interior wall needs to end at a glass panel. Revit presents with this solution:

The solution that I came up with is a bit of a workaround, but it gets the job done.
First I created a new, very thin wall.

I then drew the thin wall at the angle that the interior wall was supposed to be fased at (parallel to the existing Curtain Wall):

Having done this I cleaned up the result with the Trim tool and adjusted the length of the thin wall:

And that's it. Job done.
Friday, August 27, 2010
 Since I like to work with Revit on my laptop, I was highly irritated when Autodesk decieded to switch to an online-help-only model. It meant that I had to be online to get the "help" (for the times that the Revit-help was actually helpful - not very often).
It seems I am not the only person with this issue and so Autodesk published an article on how to change the online-help to a local help-file. See the article here.
It basically boils down to adding three lines to the Revit.ini file.
Simple as that.[Documentation]
UseHelpServer=1
HelpBrowser=0
On a personal note: This is my 100th post. Happy Birthday to me!


 Posts


