Monday, August 31, 2009
Just a short one.
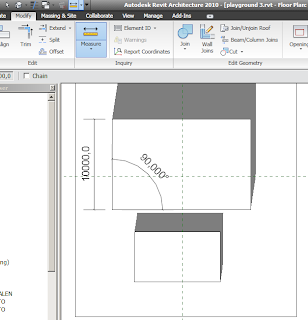
When drawing / moving / changing things using the temporary measurements in Revit, you have the option to insert a calculation instead of a number. Just start your input with an equal-sign '=' : This way you don't need to search for your own calculator under the piles of paper on your desk. And it even knows to multiply before adding.
I use the temporary measure tool quite a lot, especially when working on projects other people have started and/or are working on. But I sometimes have a har time reading the result, as the text is pretty small: Well, after a quick search online, I found the solution at the Revit Clinic:
- Close Revit
- Locate the Revit.ini file under C:\Program Files\Autodesk Revit Architecture 2010\Program (or whereever you have installed Revit)
- Open it in Notepad (or similar)
- Locate the [Graphics] section
- Add the following parameter into a new line: TempDimFontSizeInPoints = X (X being the font-size in points)
- Save and close
- Open Revit

Friday, August 28, 2009
Working with Central Files has advantages when working in a group. But you also have to be careful with what you do.
One of the things you should get used to is opening the central file from the server every morning. To do this, do not go to the server directly to double-click the file!
Instead open Revit and click open:
Go then to your central file and open it, making certain to have the Create New Local option ticked. (Should happen automatically, but hey, you never know.
Now you will get a fresh copy of the central file, including all changes that have happened since you were away.
Labels: Best Practice, Central File, R2010, Revit
Wednesday, August 19, 2009
OK, so here's something I stumbled upon. I've been editing the annotation symbols for the levels that you get in the section. (just one straight line with the height on top and the name of the level below) I apply them and get this: As you can see, one of the lines is blue, the other black. They are supposed to be black as all the settings (Visibility Graphics, Object Styles, Line Styles, etc) are turned to black.
It seems that Revit will turn Annotation Symbols for levels that are attached to a level view to blue automaticaly. Nothing I have done can change that.
A bit of a bummer, as we print in color and I don't really fancy the blue.
Labels: Annotation, Levels, R2010, Revit, Sections


